I’m often asked by cyclists on a budget which smartwatch metrics really move the needle when it comes to improving power and optimizing recovery. Over the years I’ve tested several affordable watches and paired them with cheaper sensors, and I've learned that you don’t need the most expensive gadget to make meaningful gains. What matters is choosing the right metrics, knowing their limitations, and combining data in a practical way. Below I share the metrics I watch closely, why they matter, how to get them affordably, and how to use them in training and recovery.
Key metrics to track for cycling power
When the goal is to improve cycling power, the absolute gold standard is measured power from a power meter. But power meters are often the priciest part of any setup. If you can’t afford one right now, focus on the next-best metrics that are widely available on affordable smartwatches:
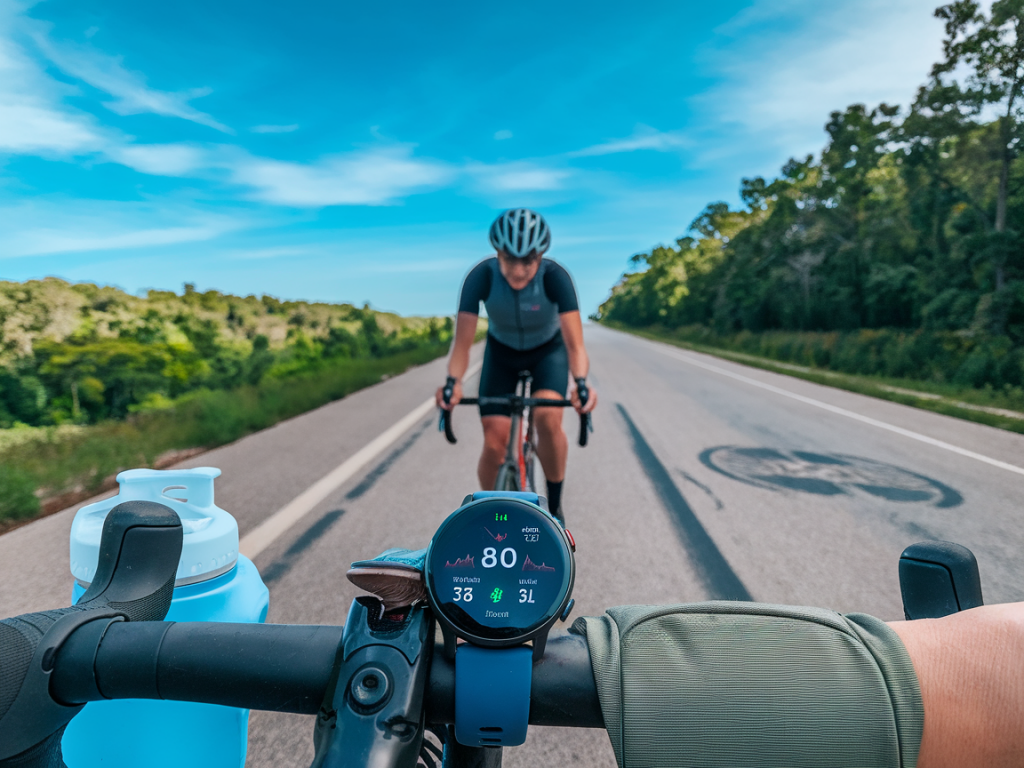
Heart rate and cadence are the foundations. HR tells you physiological strain, and cadence (rpm) helps you evaluate pedal style and fatigue effects. Speed plus grade gives context — climbing vs. flat efforts require different power outputs.
Which recovery metrics actually help?
Recovery is where an affordable smartwatch really shines. Most budget devices can reliably give you:
I use RHR trends and HRV changes to judge recovery status. If RHR is creeping up or HRV is consistently lower than baseline, I back off intensity or take an extra rest day. Sleep quality often explains the HRV swings — an inexpensive watch that reliably logs sleep (Fitbit, Xiaomi, Amazfit, and many Garmin models do this) can add huge context to training decisions.
Affordable ways to get cycling power data
If you can stretch to a small additional purchase, you can get near-power data without breaking the bank:
Even if your watch can’t display “watts” natively, you can pair it with a phone app or head unit that receives power from these devices.
Which inexpensive watches and devices give the most useful metrics?
You don’t need a pro-level Garmin to get actionable data. Here are types of affordable watches and what they typically offer:
Pair any of these with a cheap cadence sensor (<£20–40) and an affordable power estimator or single-sided power meter, and you have a very capable training system for improving power and recovery.
How to combine metrics into usable training cues
Raw numbers are useless unless they influence what you do. Here's my approach to turning metrics into action:
Simple workouts you can run with just a watch, cadence sensor and HR
When you don’t have a power meter, structured HR and cadence workouts still build power.
Table — Metric, Why it matters, Affordable availability
| Metric | Why it matters | Affordable availability |
|---|---|---|
| Heart rate (HR) | Tracks physiological load and training zones | Most budget watches |
| Cadence | Influences muscle fatigue and power production | Watch + cheap sensor |
| Power (measured) | Direct measure of output — best for pacing progress | Requires power meter; affordable single-sided options exist |
| Estimated power | Good for trends when true power meter is absent | PowerPod, trainer, or app estimates |
| RHR / HRV | Indicators of recovery and readiness | Most smartwatches with HR sensors |
| Sleep metrics | Explains recovery variability and adaptation | Most budget devices (Fitbit, Amazfit, etc.) |
Practical tips I follow
If you visit Sport News at https://www.sport-news.uk, you’ll find gear recommendations and budget builds I’ve personally tested, including setups that pair affordable watches with low-cost cadence sensors and power alternatives. Improving cycling power and managing recovery is a puzzle of many small pieces — with the right metrics and a consistent approach, you’ll see real progress without needing the most expensive equipment.